Tips on using the
Spreadshirt Designer! (please refer to the
illustration below)
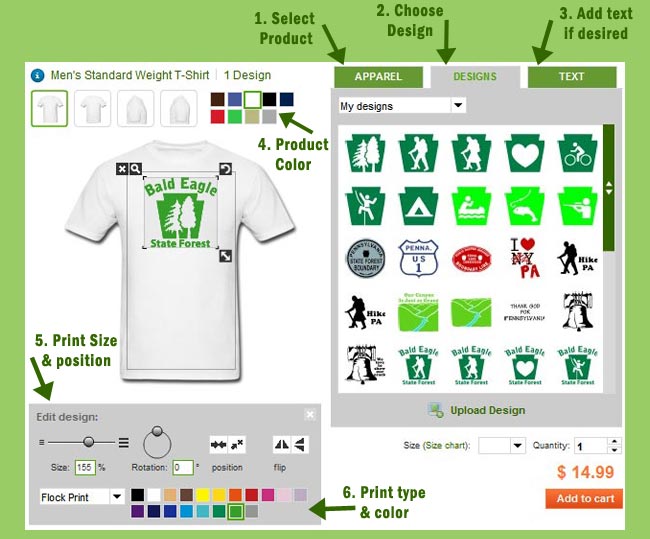
1. Choose a product from the "Products"
tab.
2. Choose a design from the "Designs"
tab. (*please see step 7)
3. Enter custom text if desired. Text is
entirely optional (and is also an additional charge).
4. Choose product color. Most products
are available in multiple colors.
5. When a design is selected, the tools
in the black box in the bottom left corner allow you to
edit your design (size, centering, etc.). The design can
also be dragged and sized manually on the shirt.
To find out the actual size of the design configuration,
click on the price.
6. When using a flex/flock design or text,
you can choose the colors by clicking the appropriate colored
box. Change designs with multiple colors by clicking the
number for that section, then choose the color.
7. (NOT SHOWN) Sometimes a design will
be grayed out in the design tab. That means that the print
type used is unavailable for the product you have picked
or the design is too big (occurs with some smaller products).
Some designs are not compatible with certain products.
BEFORE YOU
FINISH! Please remember to check the size
chart of your product before ordering. You can find links
to size charts just to the right of the price, also below
the designer in the "sizes" tab. Read more on
sizing here.
Above all, have
fun! The "confomat" is great to play with!
Please email me with any questions or problems: sarah [at]
insanart.com
|